|
|
Labeling a Bottle
with the 3D Transform Filter
|
 |
|
| NOTE: These instructions are for old version Photoshop. This tutorial is included for purposes of reminiscing. In this tutorial, you'll learn how to make lettering curve properly to fit onto a curved surface. This goes beyond the Warps you learned about for Type, and in fact, can be used for making any image curve as it would in 3D.
This tutorial was written for use with Photoshop CS, but it can be done with earlier PS and with Elements. The screenshots from step B to the end are done with Elements.
If you have an earlier version of PS or PS Elements, you don't have to hunt for your 3D Transform Filter, because it's already installed. Meet us down in Step B!
A. Install your 3D Transform Filter
1. We will begin with this search. Dig out your PS CS disks and find the one labeled "Resources and Extras." Insert this into your CD reader.
2. Find your Goodies folder. From there, surf to Photoshop CS > Optional Plug-Ins > Filters.... Opening the Filters folder should reveal two filters you don't have yet: 3D Transform.8BF and Texture Fill.8BF.
3. Open another copy of My Computer and set it beside the one where you have your CD's contents. In the 2nd My Computer, go to C: > Programs > Adobe CS > Photoshop > Plug-Ins.
4. Now drag the 3D Transform filter plugin over to your Filters folder. (You can drag the Texture Fill one, too, if you want.)
5. Close PS and then reopen it. NOW we're ready to proceed.
|
 |
|
|
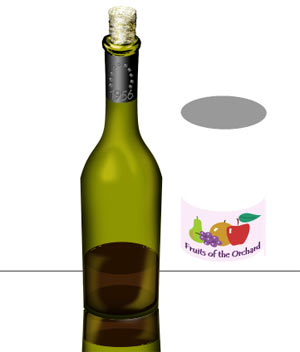
B. Bring the label to the bottle
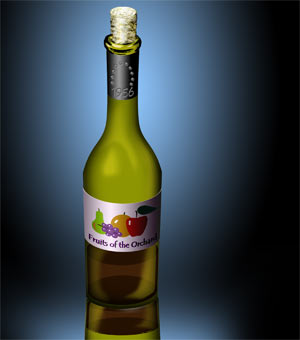
Begin with a photo or drawing of a wine bottle and your label image on another layer or in another file.
You’ll need to have the label and the bottle in the same document, on different layers. To bring the label into the bottle file, you first make sure that both files are in RGB mode. (Image > Mode... RGB)
Choose the Move tool and, with both files open, drag the label from its canvas to the wine bottle's canvas.
|
 |
|
|
C. 3D Transform the label
Filter > Render > 3D Transform. (The filter is now there! If it isn't, go back to step A.)
This brings up the 3D Transformation dialog box. Choose the Cylinder tool and drag a cylinder across the label, roughly resembling the width of the bottle.
|
 |
D. Straighten the “bottle”
We now need to move this wire frame so that, if it were the bottle, the label would be straight. In other words, you'll move the wire frame so that it becomes a rectangle.
To do this, use the Direct Selection Tool (white arrow, see at right) and drag the bottom center point upward.
|
 |
E. Move the bottle frame with the label
To move the frame with the label to make it shaped like the bottle, use the Trackball Tool. It is fun to drag this all around, to see what your label would look like in all positions.
Once you get it where you want it, click OK.
|
 |
F. Cleanup
Now we need to clean up any extraneous bits. In my example, I have the gray circle at the top, and a little of the label to the right side.
Select these areas and hit the Delete key on the keyboard.
|
 |
G. Tighten up the label
You may need to do a transformation to make the label fit precisely on the bottle.
Use Ctrl-T to bring up the transformation handles. Hold Ctrl to pull the corner handles if you need to distort the transformation, as I did here.
|
 |
H. Shade the label
Add another layer above all the others. Put this layer into Linear Burn Blending Mode.
Ctrl-click the label layer to load it as a selection.
Then use your gradient tool (Reflected Gradient, white > black) to shade the label.
A tiny drop shadow can help to make this more real, as can a 1-pixel-wide stripe of white above the label. You can do this by loading the label as a selection and filling this selection with white on a layer beneath the label layer. Then use the Move tool and the up arrow to scoot it up just one pixel.
|
I hope you enjoyed this tutorial!

|