 Using Adjustment Layers to Alter a Photo Using Adjustment Layers to Alter a Photo |
|
 |
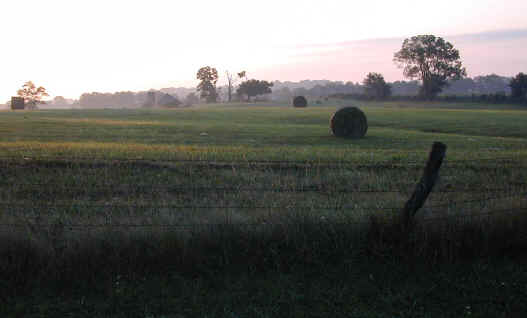
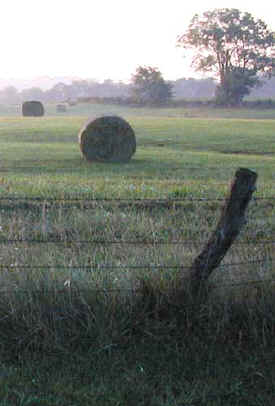
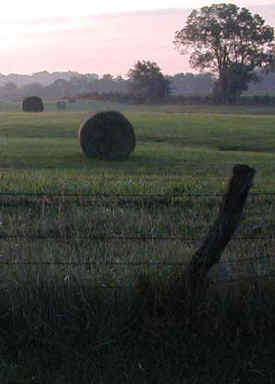
Pastoral scene before manipulation.
|
| Adjustment layers are so versatile that it would be difficult, if not impossible, to show all of their uses in one little tutorial. In this tutorial, therefore, we will work with just a few.
As you work through this tutorial, you will get practice with the following:
- Examining a photo to determine its problem areas.
- Creating an adjustment layer.
- Exploring a Hue / Saturation adjustment layer and Gradient Map adjustment layer.
- Adjusting Levels on an adjustment layer.
- Using a layer mask on an adjustment layer.
- Making a gradient.
- Using a layer mask on a regular layer.
|
The techniques you will work with here can be used for any photo, of course, but if you want to work along with my photo, you are most welcome to use it for this purpose.
To save it to your own disk, click the picture above to go to the full-sized version. Then right-click that pic and choose Save As..
File it in a place where you will be able to actually find it.
If you are patient with yourself, you can do this tutorial even if you are a beginner with Photoshop. Just follow the instructions very carefully.
This tutorial was written with Photoshop 6, but it will all work with PS 7. The screenshots may look a little different for versions prior to 6, but the tut will work. The main theory will work with Elements, but some of the specific adjustment layers are not available.
|
|
Adjustment layers can be used for making many types of adjustments to your work, without actually doing anything to the original layer. It is akin to laying a sheet of clear colored plastic overlay over your work. Your picture will look colored, but then when you take off the plastic overlay, your picture is unchanged.
|
If you are in a hurry to get to the effect, this tutorial might well frustrate you. My goal here is to help you to see the POWER of these tools, to encourage you to explore them, and to give you some activities to facilitate this process.
|
|
An adjustment layer can change much more than just the color though! Let's try some things.
1. File
-> Open ... and choose the picture with which you want to work.
a. Click the New Adjustment Layer icon at the bottom of the layers palette (or choose Layer -> New Adjustment Layer) and choose Channel Mixer. Then click OK on the box that comes up.
You will get a box in which you can move the sliders around. Do this and see what it does to your picture. At the right is one that i came up with. Find a setting you like and click OK.
Click the eye for that adjustment layer in the layers palette. What happens? What happened to your original picture?
When you are done playing with this, drag that adjustment layer to the trashcan in the layers palette. Notice that your original picture remains unscathed.
|
|
|
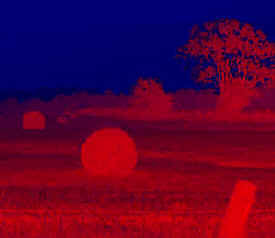
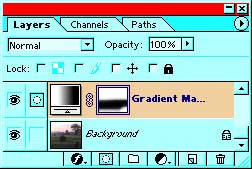
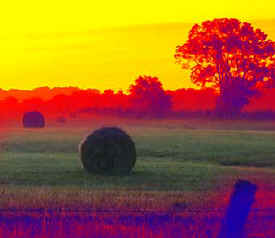
b. Now do the same thing only choose Gradient Map. (Layer -> New Adjustment Layer ... Gradient Map.)
Then choose one of the gradients there and watch what happens to your picture. Run through all of them. Cool stuff, eh? Find one you like and click ok on the box.
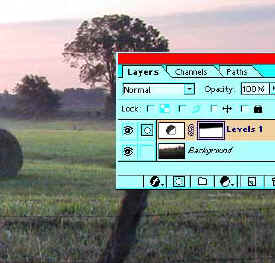
Now, still exploring, notice in the layers palette that the new adjustment layer has a white panel beside it? That is its built-in layer mask. It is white now and because of this, that layer is fully applied. In other words.. well, I think that the next step will clarify this.
|
 |
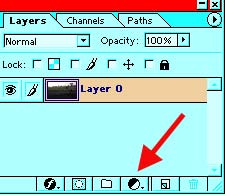
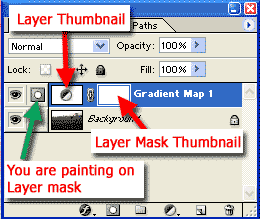
| c. In the Layers Palette, click on the layer mask thumbnail to select it. (right red arrow)
Notice that the paintbrush in the palette next to the eye is now a layer mask icon. (See below.)This tells you that you are working on the layer mask.
Choose a wide airbrush with black as your foreground color. Paint a swath across your image.
Now what you just did is something pretty cool. Notice that painting the black on this adjustment layer's mask rendered this part of the layer inactive. Very useful stuff!
What happens when you paint with white where you just painted black?
d. Ok now this part is one of the very coolest things about adjustment layers:
Double click the layer thumbnail for the adjustment layer. Yes! you can edit the adjustment layer! What flexibilty!
|
 |
|

|
 |
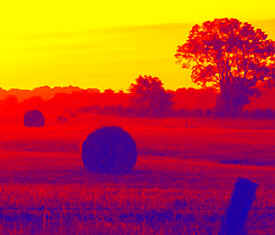
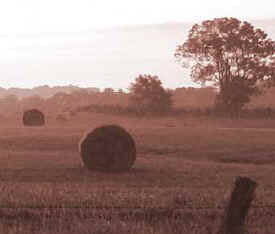
| d. At the
right is a version of this photo on which I used a Hue/Saturation
adjustment layer. I checked "colorize" and then pulled sliders
around till I liked this sepia tone.
Play with the other kinds of adjustment layers. Posterize or Invert can also make some pretty neat effects.
When you are finished playing around with these activities, drag your adjustment layers to the trash can in the layers palette (or turn off their eyes).
|
 |
| 2. Ok.. now time to do some real work on the picture.
The image that we started with here is straight out of my digital camera (Nikon Coolpix 950). To my eyes, it is too dark in the foreground and the middleground, while the sky is washed out white for the most part by the sun into which we were shooting. We are going to fix all of this with adjustment layers!
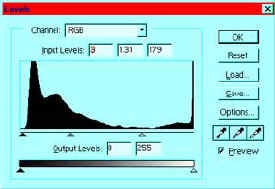
First let's work on that grass in the middleground. Go to Layer -> New Adjustment Layer ... and choose, in this case, Levels.
Adjust the sliders till the grass in the middleground is nice and green, not too dark. At the right are my settings and below, my result at this stage. Click OK in this box.
|
 |
 |
| 3.
This did indeed make the middleground less dark and the foreground too.
We now have some detail on the fencepost and on the haybale. However, we
have lost the detail in the sky and the background hills are way too
light.
So how can we make it so that the lightness here only applies to the parts where we want it?
|
| 4.
We are going to paint on the mask for the adjustment layer just as we
did in 1c above! Click the mask and then, using a feathered airbrush,
paint black on the mask over the sky and the hillside.
File -> Save As.. and choose a name for this file. Leave it in psd format for now.
Now the foreground is still too dark in my opinion, so i want to lighten it further. The problem is that i don't want to lighten the middleground anymore. Adjustment layer to the rescue! Yes, you CAN pile them up!
It should be noted that an adjustment layer will serve to "adjust" everything that is under it, including any other adjustment layers.
(For example, if you have a hue/saturation layer above a levels layer, you will get a different effect than if you had them switched.)
|
 |
|
5. Layer -> New Adjustment Layer .. Levels. Adjust the sliders so that the foreground is bright enough. Click OK in the levels box. Never mind that some parts are TOO light. We will mask this layer for those parts!
File -> Save.
6. Click on the mask for the layer that you just made and then with black, and a big feathered airbrush, paint the areas that are made too light by this adjustment.
You may want to use a hard-edged brush to paint this mask white over the fencepost so that the nice detail there shows. My result at this point is to the right.
File -> Save.
|
 |
| The sky is
too white and washed out for my tastes. I still want that nice wisp of
cloud, and i still want to have the light coming from the left, but I'd
like to have SOME blue to the sky.
As with anything in Photoshop, there is more than one way to achieve a blue sky here. I will do it by making a blue sky and then blending it into the scene with use of a layer mask. Here's how:
7. With the top layer selected, click the new layer icon next to the trash can in the layers palette. Choose a nice shade of pale summer blue for your foreground color (I used #B2CEFB.)
Alt-backspace to fill the layer with the blue.
Eeek! The scene has disappeared under that blue! No worry. We will bring it back in step 8.
Click the "Add layer mask" icon in the layers palette. (the circle inside the square).
|
8. Choose a wide feathered airbrush and then click on your layer mask for the sky layer. Paint your scene back in then, leaving the blue showing where you want it. If you paint out too much blue, just switch to a white brush and paint it back in on the layer mask! Powerful stuff here!
9. As a final step, I decided that i wanted to add some crispness to the image.
When you do this, think about to WHAT you want to add crispness. Do you really want to sharpen the levels adjustment layer? No, you want to sharpen the image itself. So be sure that your background layer (the main image) is selected in the layers palette. The paintbrush will be showing next to the eye.
Then Filter -> Sharpen -> Unsharp Mask. I like to use a setting of 1 pixel or less and about 100% so that I don't get that oversharpened outline around everything.
File -> Save. If you want to print this out to hang on your wall, then you will want to save this as a tiff or a jpeg. File -> Save as ... and choose your file type. (File -> Save for Web is good for making images for the web (email or for display on websites.)
|
|
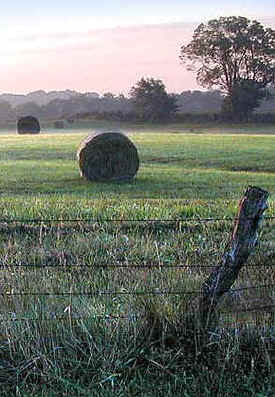
Pastoral scene before manipulation.
|
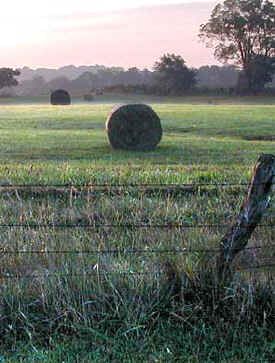
Pastoral scene after manipulation.
|
|
I hope you enjoyed this tutorial and that it inspires you to think of some useful and creative ways to use adjustment layers!

|
jj |

