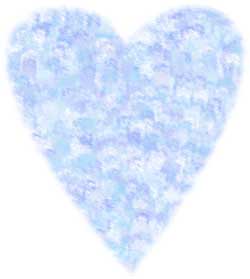
 Impressionist Heart Impressionist Heart
fun with paths and brushes in PS 7
This tutorial, written with Photoshop beginners in mind, is part of the Painting with PS 7 collection of tutorials. Completion of this will enable you to gain a lot more facility with the use of the brushes in PS 7. You will also learn/practice the following:
- Making and adjusting a path with the pentool.
- Converting a path to a Selection.
- Feathering a selection. Adjusting brush attributes including size, scatter, and color dynamics.
- Loading a Brush Collection.
- Saving a Brush Collection.
- Making your own Brush Preset.
- Making a new Tool Preset.
|

For more on using the painting tools in Photoshop 7, see
 PS Painting 1, Brushes in PS 7 PS Painting 1, Brushes in PS 7
 A Red Rubber Ball A Red Rubber Ball
 Flowers Along a Path Flowers Along a Path
|
|
We will approach this as follows: First we will make a path, make a selection from the path, and then fill the selection with our painting. This is a handy way to keep our paint "contained" within the borders of our shape.
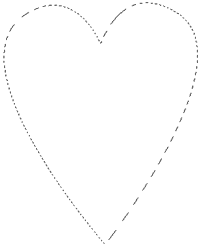
1. Make a heart-shaped selection: You can do this either by making your own path and converting it to a selection, or with a custom shape path and converting that to a selection, or by drawing it with the lasso tool. I did mine as follows:
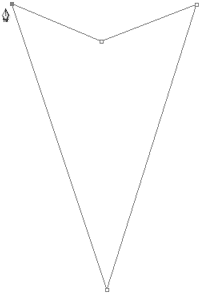
a. Choose your Pen tool. It might be hiding in the flyout under one of its partners. In any case, it is beneath the arrow tools in PS 6 or 7.
b. Tap your pen around in a counterclockwise direction to make your anchor points.
|
 |
|
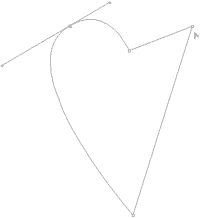
c. Switch to the Convert Point tool, one of the tools in the Pentool flyout.
d. Click and drag on one of your top points, dragging to your left. Your bezier handles will come out as you see here, and you will get the beginnings of a nice curve.
Don't worry if these are not perfect. The two middle points for your heart you don't need to convert to curves. They will look best if you leave them angular.
If you have to adjust one of your anchor points, you can do that by holding ctrl. This changes whichever pentool you are using into the Direct Selection Tool, enabling you to move the point.
|
|
Making paths is sometimes not intuitive and often not easy. It takes some practice to get good at this, but it is a skill that will serve you very well for lots of things with Photoshop.
|
|
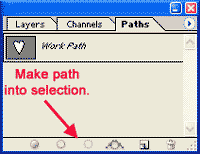
| e. Click on the Paths tab to switch to the Paths Palette. Click the "Make Path into Selection" button. This will.. guess! |
 |
| f. And here are your marching ants!
g. If you like the feathered look to my edges in my result, you can make your edges the same by feathering your selection. Select -> Feather .. and make it 5 pixels.
2. Now to set up to paint!
a. First click the New Layer icon at the bottom of the Layers Palette so that you can color your heart on a pristine layer.
b. Click Brush Presets and then find the "Plastic Wrap - Dark 90 pixels" brush.
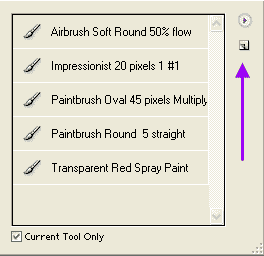
If this brush is not there already, you will have to load it. To load a brush collection, do the following:
- Click the Brush Preset picker arrow.
- On that dropdown, there is an arrow to the top right. Click that.
- Down at the bottom are the brush collections that you can load. This Plastic Wrap brush is in the Faux Finishes collection.
- Click Append when it asks you, unless you want to replace the brushes you have with the faux finishes.
|
 |
|
Note: Appending brush collections will make your brush collection bigger and therefore, PS will load more slowly!
|
TIP: If you have made brushes of your own, before you replace your brushes, be sure to SAVE the brush collection that you have! You save them in that same dropdown, the arrow off the brush preset picker. Click where it says "Save Brushes" and give your collection a name.
|
|
c. Use the [ key to make the brush considerably smaller, as I have here. With PS 7, you can now resize ALL of the brushes with the [ and ] shortcuts!
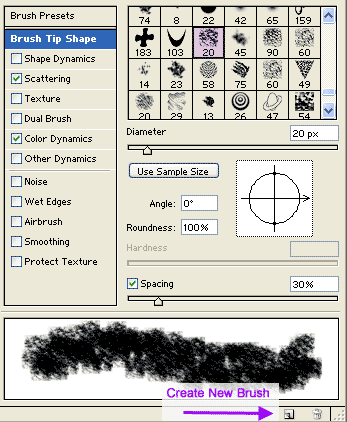
Another way to resize your brush is in the sizing option in the brushes palette (available when you have clicked Brush Tip Shape). Mine is 20 pixels.
d. In the Brushes palette, click the words, "Color Dynamics" in the brushes palette. (Not the checkbox) This brings up the options for this attribute, enabling you to adjust them. (This will not permanently alter your presets.)
Move the slider for Foreground / Background Jitter to 100%.
Make your Hue Jitter 10%.
e. Choose a color with a light value for your foreground and white for your background.
3. Color in your heart!
|
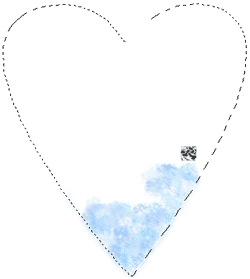

|
Impressionist Heart Exercises
a. Try this again on another layer with hue jitter set to minimum.
b. Then try it again with foreground to background set to 50%.
c. Try this with two different colors for foreground and background.
d. Finally, what do you think will happen when you do this with Hue Jitter set to 100%? Try it!
|
|
| 4. Do you like this brush and think you might want to use it again? Make it a brush preset! As with anything in Photoshop, there are at least 3 ways to do this.
Here's one way:
Get your brush the way you want it. Click "Create New Brush" at the bottom of the brushes palette.
|
 |
|
If you REALLY like it, you can make it a tool preset, as well. To do this, bring down the Tool Preset box by clicking on the little arrow beside the brush to the far left side of the options bar. Then click the Create new tool preset button. You will have an option here to name your brush. You can also save the colors you are using when you do a tool preset!
If you want to later delete it or rename it, you can click on the Brush Preset Picker (the brush sample in the options bar or its arrow, either one) and right click on your brush.
|
 |
| Here is one that one of my students made! (It is well worth the click to see it in its full glory. (I love this!)
I hope you enjoyed this tutorial and that you learned some things about painting with the airbrush!

For more on using the painting tools in Photoshop 7, see
 PS Painting 1, Brushes in PS 7 PS Painting 1, Brushes in PS 7
 A Red Rubber Ball A Red Rubber Ball
 Flowers Along a Path Flowers Along a Path
|
![]()
![]()