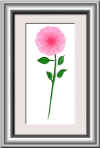
 Framing a Picture Framing a Picture
In this tutorial, written with beginners in mind, we are going to mat and frame a picture using a frame and mat that we make ourselves. We will learn/practice the following skills:
- Cropping a picture.
- Using layers to manipulate images.
- Using gradients.
- Using the rectangular marquee and the polygonal marquee.
- Using Layer Effects.
As you work through this, read the first line of the step and think about how you would do it. Try it on your own before you read how I did it.
(This tutorial was written with screenshots for PS version 5.5, but it works fine for newer versions and for PS Elements 2, as well. I give directions for later versions where they vary.)
|


|
|
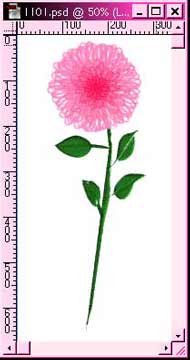
for the picture that you want to frame. Double-click its layer in the Layers Palette to make it so that it isn't the background layer.
File > Save As and choose a name for your file. Save it in PSD format.
|
 |
2. Make your mat:
a. Enlarge your canvas to make room for your mat: Image > Canvas Size and make it the dimensions you want your picture and the frame ultimately. Making it too big won't hurt. Making it too small won't hurt either; you can always change it later.
b. Position your mat layer below your picture: Click the new layer icon next to the trash can in the layers palette. Drag this new layer below the picture layer in your layers palette. This layer will be your mat. Double click the layer and label it "mat".
c. Color your mat: Choose a shade for your foreground color in your toolbar. Alt-backspace to fill the layer with the color. (What you do for your mat is completely flexible. I used a light ivory shade and made my noise mono-chromatic and about level 25.)
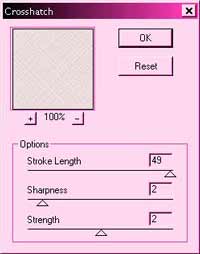
d. Put a design or texture on your mat: Filter > Noise > Add Noise .. Now let's do something to the noise. There are many ways you can alter the noise to get a cool result for your mat. I'll make my now-famous Wheat Thatch paper. Filter -> Brushstrokes -> Crosshatch. Here are the settings that I used for my wheat thatch texture.
Ctrl-S to Save.
|
|
3. Make your frame. Do a LONG side first.
a. I am going to make a sculpted pewter frame for my picture. We will make one long side and then duplicate it for the other three sides. By doing this, we will ultimately have 4 layers for the frame. Click the new layer icon at the bottom of the layers palette to make a new layer. Using the rectangular marquee, select the area for one of the long sides of your frame.
b. Click your gradient tool and hold for a second. When the flyout happens, choose the reflected gradient tool. (In version 6 - 7 or Elements 2, you will choose the reflected gradient in the Options Bar.) Make white your foreground color and black your background. In the Reflected Gradient Options, choose "foreground to background". This will give you, in this case, the white -> black.
Beginning in the middle of the area you selected, drag a reflected gradient across your frame. Hold Shift to make the gradient go at an exact right angle. I dragged mine horizontally. Ctrl-D to deselect.
(If you are new to this tool, take this opportunity to play with it a bit. Click back in your history palette to undo if you need to, but as long as you are messing in the selected area, you can't do too much damage. <g>) Ctrl-D to deselect.
c. Now sculpt it a little. Use the Rectangular Marquee again to make a smaller rectangle inside that one and do a linear gradient from right to left. This results in the effect to the left. Ctrl-D to deselect.
Ctrl-S to Save.
|

|
|
d. Drag the frame piece that you have made down to the "New Layer" icon to duplicate it. You need 4 copies, one for each side of your frame.
e. Rotate your frame pieces around so that they are surrounding your picture. Use Edit > Free Transform. Bring your pointer outside of the bounding box and it will turn into a little turning arrow. Hold the Shift key as you rotate the pieces. (What does holding the Shift key do?)
Be sure that you rotate them so that the gradients are going the right way so that they match up in the corners. If you care deeply about the shadows not looking right, you can fix them manually or with lighting effects when you are done, or you can use a different kind of frame on your next project. For now, I will not worry about this.
f. Proportion the space for your picture as you want it; we will trim the long ends of your frame next.
Ctrl-S to Save.
|

|
4. Miter your frame.
a. When you line up your frame pieces, be sure that they overlap completely as mine do here. You will see why in the next step.
b. Now trim off the parts of the frame that you do not need. Study the end result for a moment before you read the next part and see if you can figure out how to do it.
|
 |
|
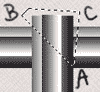
c. Choose the Polygonal lasso tool and click in one of the inside corners of the frame (A). Hold Shift, to constrain your selection to 45-degree increments and then click to the outside of that corner (B). Click over beyond the inside of the corner that you are getting rid of as i have here. (C). Double-click to close the triangle.
d. In your layers palette, click on the part of the frame that is overlapping where you selected your triangle. In this case it is the vertical. Hit the Delete key. A mitered corner! Ctrl-D to deselect.
|
 |
|
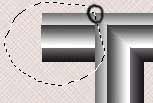
e. Once you get the extra overlapping parts of the frame deleted, get rid of the extra parts behind the frame.
For this one at the left, select the upper horizontal piece of the frame, make your selection, then hit the delete key. Ctrl-D to deselect. It is critical to have your selection intersect at that corner that i have circled. Why is this so important? (Try it and see! Go back up in the history to undo it after you do.)
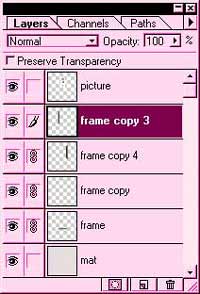
f. With one section of the frame selected in the layers palette, click the little box next to the eye for the other frame layers. (See screenshot at right.) This links the layers. Ctrl-E to merge the linked layers. Now your frame is all nailed together!
Ctrl-S to Save.
|
|
5. Trim your mat.
a. In order that we get part 6 to work right, we need to decide what order we want the layers. If you want your picture to be on top of the mat in the final result, then the picture layer is fine as it is. Otherwise you will need to cut a hole in your mat for your picture to show through and then drag your picture layer below your mat. I think that is what I'll do for mine.
b. Make a selection with your rectangular marquee tool on your picture layer where you want your mat edge to be. Drag your picture layer below your mat layer in the layers palette.
c, Now cut your mat. With your mat layer selected, hit the Delete key. Et Voilà! Ctrl-D to deselect.
|
 |
|
d. Trim the outside of the mat. Make a rectangular marquee appearing inside the frame. With your mat layer still selected in the layers palette, Ctrl-Shift-i to inverse your selection and hit Delete. Ctrl-D to deselect. Trimmed mat!
Ctrl-S to Save.
|
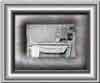
6. Apply layer effects to give it that final 3D look.
a. You could call it quits before this, but this last step adds more realism to the project. Select the mat layer in the layers palette and then Layer > Effects. (In later versions of PS, you can click the little  at the bottom of the Layers palette. In Elements, you'll be using the Effects or Styles palette.) Try a drop shadow with its various settings.. Try the different bevel/emboss settings. at the bottom of the Layers palette. In Elements, you'll be using the Effects or Styles palette.) Try a drop shadow with its various settings.. Try the different bevel/emboss settings.
b. Now select the frame layer and do effects there too.
|
|
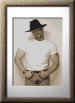
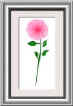
Here are some others that I've done.
|
|
|
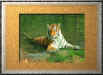
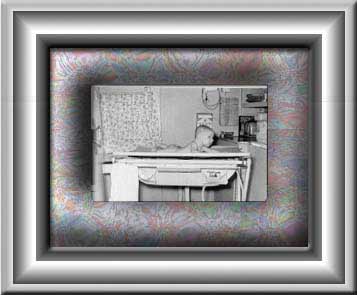
Try different materials! Here are some that students have done.
|
   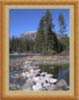
See what another artist did with this tutorial!
|


