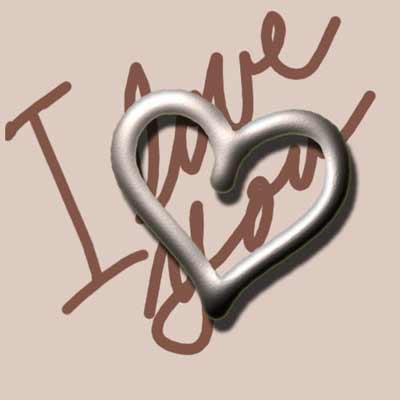
Hearts
-- Heart 2 Hearts
-- Heart 2
Here is another way to make a
heart with the pen tool. In this tutorial you will practice the
following skills:
- Use of the Freeform Pen tool.
- Use of the Direct Selection Tool.
- Making a Calligraphy Brush.
- Stroking a path.
- Filling a path.
Screenshots for this tutorial were done with version 5.5 (yes, really!), but I have directions here for newer versions.
|
|
| For this heart, you make the path for the heart and then fill the path and stroke it. Here we go!
1. Set up first:
a. File -> new and make your canvas 500x500.
b. Select your Freeform Pen tool in the flyout under the pen. Be sure that the pen tool is set for "paths" in the Options bar, if you have version 6 +.
|
|
(In version 5, you double-click the square for it which will bring up the Pen Tool Options. In version 5.*, the number for "curve fit" can be set between 0.5 and 10 pixels. A higher number will mean that your curve is less "precise" to your drawing. If your hand is shaky or you don't draw a good smooth line, don't worry about that. With the pen tool you can MAKE it smooth. However, if you don't draw smoothly, for this project, you maybe ought to have a higher number for curve fit.
Try it out with a setting of 0.5 and then with a setting of 10 and see what the difference is for two similar curves. After you decide on one, click on the history palette back to "new" (scroll to the top of it) so you can have a clean canvas. )
* Curve fit doesn't apply to later versions, that i can see.
|
 |
| 2. Draw your heart. If you don't like the way it looks, just undo it by clicking above that step in your history palette. Don't worry about making it perfect though. We will fine tune it in the next step. |
 |
3. Ok.. let's go for a perfect sweeping and smooth-lined heart.
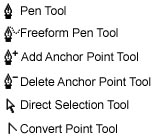
- The little squares that show up around the perimeter of your heart are called anchor points. You can use them to move your heart around.
- The line segments that pop out of the points when you click the direct selection tool on them, are called Bezier handles. The black points at the end of the Bezier handles are called Control points. You use the Bezier handles and control points to adjust the curvature of segments of the curve. Move them to your heart's content!
- With the Freeform pen tool still in your hand, hover over the path that you just made and watch what happens to the pen.
- If you hover over an anchor point, it changes to the Delete Anchor Points tool.
- If you hover over a place where there is not an anchor point, the tool changes to the Add Anchor Point tool.
- Modifier keys and the Pen tool:
- Hold the Ctrl key while you hover. It changes into the Direct selection tool.
- When your path is closed, while you hover over an anchor point and hold Alt, the tool changes to the Convert Point tool.
- Ctrl-alt makes a Duplicate Path tool. Cool stuff to try out.
- All of this seems overwhelming right now, but a bit of practice will make it seem like you have always known how to do it!
a. For the adjustment that you are going to do, choose the Direct Selection tool, the white arrow in the tool box (or hold the Ctrl key).
- With this tool you can move the anchor points around without adding to your path or seriously distorting anything. You can just hold the Ctrl key while you use your pen if you need to do a quick adjustment, too.
|
 |
| b. With your Direct Selection tool, drag the various anchor points around, exploring how the tool works. Use it to drag the Control Points around too, changing the shapes and sizes of your curves.
c. If, as you are doing this, you see that you have an anchor point where you really DON'T want one, that is, it is making a sharp point where one just doesn't belong, then you can use the Delete Anchor Point tool to get rid of it. Sometimes wild things happen to your curve though if you get rid of an anchor point that really is anchoring your curve. Check this out. If you do any real damage you can either start over, or go back in your history palette. No way to hurt yourself badly at this point.
|
 |
4. Next we will make a calligraphy brush, if you don't have one. Here's how.
- Type b to choose the Brush tool. Bring up your Brushes palette.
- In version 5.*, in the brushes palette, click the arrow at the top and then click New Brush. These settings at the right make a fairly large calligraphy brush. Click OK and you have it!
- *In version 6, you choose brushes in the brush options bar. Click the arrow beside the brush that is showing toward the left and you will get your brushes palette. (Or you can hit enter on the keyboard.) To set spacing, click the brush itself in the options bar (NOT the arrow beside it.)
|
version 5.* |
- In version 7, click on the Brushes palette. It is probably in the palette well at the top right. If not, click Window -> Brushes.
- Make your settings something like mine to the right. This is a view of the version 7 brushes palette.
|
 |
| 7. Now we will fill and stroke the heart. At the bottom of the Paths palette, there are six little icons. The first is fill and the second is stroke.
a. Let's fill the heart first. To fill a path, you need a color and a canvas.
- For the canvas, make a new layer, by clicking on the Create a New Layer button at the bottom of the Layers Palette.
- Pick a color in your Foreground Color Picker.
- Return to the Paths palette.
- Click the fill icon.
b. To do the outline, you will stroke your path. To stroke, as for filling, you need a canvas and a color. But you also need to tell PS which brush you want.
- For the canvas, you may either use a new layer or you can stroke on the same layer you just did your fill. Your call.
- First pick your color from the Foreground Color Picker.
- Then choose your brush. In the Brush Options, be sure that everything is as you want it. For spacing, you will want 1% to get a nice smooth stroke. In version 7+, adjust spacing within the Brush Tip Shape attribute.
- Then click the stroke icon at the bottom of the Paths palette.
9. Once you are done with your path, you can click outside of it in the paths palette, or you can drag it to the trash in the paths palette to get it out of the way. Save your work!
I hope you have enjoyed this cardiac adventure! For more hearts, go to Heart 3!

|
 |
What can YOU think of to do with the hearts you make? Send me your heart! :)
Student work (More here!):
|
|
|
|
|
RETURN to Janee's Archive Tutorial Index
email me!
Ask tutorial questions in the myJanee.community:

|
|
|
| All material in this site is ©2001-2004 by myJanee.com Graphic Creations. No part of it may be used without my written permission. If you have questions or comments about this site or its construction, contact Janee at myJanee.com Graphic Creations by email. |
|
|
|
|