|
Website Interface with Rollovers
Part 4: Slicing the Interface
|
 |
|
| What is "slicing," and why do we want to do it?
Slicing is Photoshop and ImageReady's quick way to make several separate files out of one image file. There are several instances where you would want to do this, and they mostly involve web or other interactive media use.
Suppose you are making an image which is partly a single solid color. The rest of the image contains lots of color gradation. You may then want to save the single color part of the image as a GIF and part as a JPG. This can enable you to optimize the filesize, making your web-load time faster.
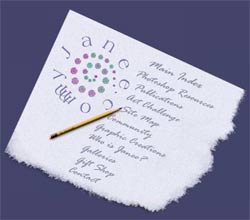
You may want to put a sliced image into a table, enabling parts which are solid color to just fill an empty table cell. That's what I did with my main interface design you see below.
|

The Slice Tool
|
|
|
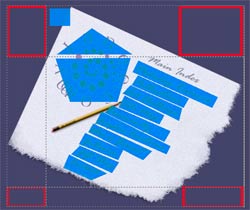
Here's the same image as seen in GoLive. (The blue indicates where have made "hot spots" which are linked. The red squares indicate table cells or parts of cells which are left empty. Size of these parts of the image = zero!
|
| Another time you will want to slice an image is when you want to have certain parts behave differently when your visitor rolls their mouse over or clicks part of the image. Bingo! That's what we want to do! |
1. Plan your slicing.
OK, you don't have to do a lot of planning. If you mess up, you can always add slices later or start over. But thinking about your goals can reduce the time you spend here.
For this job, we just want to be sure that each button is completely inside its own slice. Since the glow is part of each button, it should be included within the slice, as well.
If you want precise slices, you can drag guidelines to aid in your slice placement. Here, it won't be necessary to be that picky.
|
2. Make your important divisions into slices.
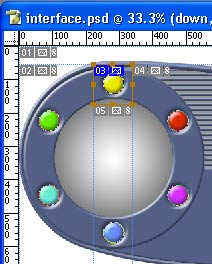
Choose the Slice tool. Click-drag it, just as if you were using the Rectangular Marquee, and enclose your first button in a slice.
| TIP: If you don't see the slices, use View > Show .. and check Slices.
Similarly, if you're ever working on a photo and see that little 01 bit in the upper left corner... you got it! That's a slice designtion. Use View > Show... and uncheck Slices to lose that annoying thing!
|
|
 |
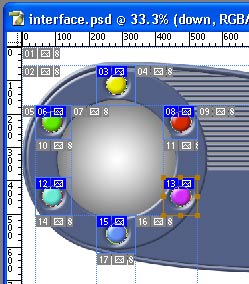
| Continue in this way and make slices for all of the buttons. For this example, it is easy to use the vertical borders made by slicing the yellow button as guides for slicing the blue button.
Notice that some of the slices have blue indicators and others have gray. The blue slices are User Slices, that is, you made them. The gray ones are Auto Slices, that is, your car made them! 
|
 |
| Now be sure that all of your layers show their differences inside these slices.
If you end up with some glow outside a slice, for example, you can adjust your slide boundary. Use the Slice Select tool to choose the slice and then you can adjust its boundary by dragging it larger.
Save your PSD file before we head over to Part 5 of this tutorial!
|
 |
|
|
|
|
RETURN to Janee's Tutorial Index
Ask tutorial questions in the myJanee.community:

|
|
|
| All material in this site is ©2001-2004 by myJanee.com Graphic Creations. No part of it may be used without my written permission. If you have questions or comments about this site or its construction, contact Janee at myJanee.com Graphic Creations, 7193 W Gifford Rd, Bloomington, Indiana, USA 47403 or by email. |
|
|
|
|