Beyond TV Lines -- Using Patterns Beyond TV Lines -- Using Patterns
In this tutorial, we will go through several ways to use patterns in Photoshop. As you work through this exercise, you will learn several useful techniques:
- Using the Navigator palette.
- Use the Color Picker.
- Using the paintbrush/airbrush.
- Defining a pattern.
- Filling a selection with a pattern.
- Using layers.
- Using layer effects.
|


If, as you are working through this or any of my tutorials, you see something that is in purple, you can click on it for further clarification. This will take you to my "Wait! Start from the Beginning!" page and to that particular topic.
|
| 1. File -> New ... and
make your canvas 500x500. (Size does not matter here really.)
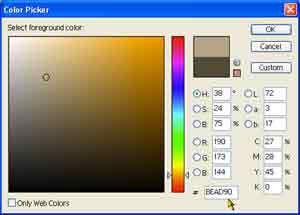
For the foreground color for my pattern, I'm going to use gold and my favorite hue to use for gold is one I call BEAD90. That is the hexadecimal code for it and I can remember it easily (mostly because I have written that number on my monitor).
2. Click your color swatch in your toolbar. If a box comes up that says "Custom Color" instead of "Color Picker",  as mine does to the right, then click the "Picker" button on the box that does come up. Now at the bottom of that box, uncheck "only web colors". (Web colors gives you a limited palette of colors that are visible to browsers to display 8-bit images.) If you want to use my gold, down at the bottom where it says #______, type in bead90. as mine does to the right, then click the "Picker" button on the box that does come up. Now at the bottom of that box, uncheck "only web colors". (Web colors gives you a limited palette of colors that are visible to browsers to display 8-bit images.) If you want to use my gold, down at the bottom where it says #______, type in bead90.
Note: Versions prior to v. 5.5 do not have the "Only Web Colors or the place to type in your color number. Just choose a dark tan like mine. Click for more on colors.
|
Click this to see it larger.
|
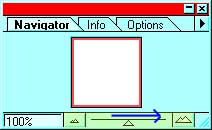
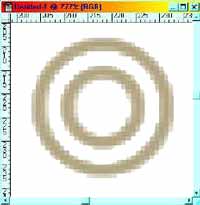
| 3. Click your Navigator tab
to bring up your Navigator Palette. Pull the slider at the bottom
to the right to zoom in. Zoom to about 400% so you can get a good
precise pattern here.
(Notice that the square inside the white area gets smaller as you zoom in. Hover over it. What happens to your pointer? Click that now and drag it around to see what happens.)
|
 |
| 4. Choose a brush from your brushes
palette. I'm using the double circle one. If you don't
have this brush, you have not unpacked it from your Goodies
folder!
(For Version 6, click here to see how to load more brushes.)
|
 |
5. Make a new layer by clicking the new layer icon at
the bottom of the layers palette. Select your airbrush in your toolbar
and then hold it to your canvas making a blob like this.
File -> Save As .. and think of a name for your project. Leave it in .psd format.
|
 |
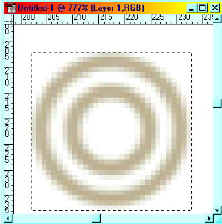
| 6. Using your rectangular marquee, make a square
selection around your circle as i have here. Hold the shift key as you
drag to make it a perfect square.
7. Keep in mind that ANYTHING you see inside your square will be part of your pattern. If you don't want a white background for your pattern, click the eye in your background layer to make it invisible.
8. Edit -> Define Pattern. Ctrl-d to deselect. Turn off the eye for the layer where you made your pattern or you can drag it to the trashcan in the layers palette if you want to.
9. Double-click your zoom tool to bring zoom back to 100%.
File -> Save.
|
|
|
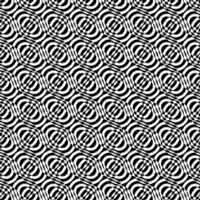
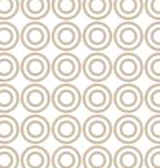
10. Make a new layer. Now fill your area with the
pattern. Click on Edit -> Fill -> and choose Pattern. Since you
defined the pattern, that will be the pattern it will use. Cool, eh? I
think that no matter how simple the pattern, it becomes cool when the
canvas is full of them!
File -> Save.
Ok now let's have some fun. Since you did the pattern on its own layer and you turned off the background before you defined it, the part that is not "paint" is transparent. ... meaning "see through"... meaning that whatever you do below it will show through. :)
|
 |
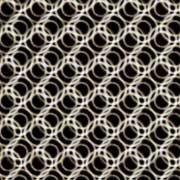
| 11. Drag the layer with the pattern to the new layer
icon to duplicate it. Now with your Move tool, drag it around a little.
Infinite number of patterns here and this is just one brush tiled one
way and duplicated! Make your background a contrasting color. |
 |
|
Now let's define a different pattern and make your initial with it, embossing it upon the background you just made.
Do as much of this as you can without looking at the directions above or below. What you will do is, on a new layer, make a new pattern, make a selection of your letter, and then fill that selection with the pattern in the same way that you filled the whole layer in step 10.
I will give you some clues below for finishing this. Don't look at them till you give this a try. Keep in mind that, as long as you are working on a new layer, you cannot mess up what you have already done. You can always just ditch the new layer if you don't like it!
|
 |
~~ Final Jeopardy Music ~~
|
| CLUES for finishing the project.
Ok, here are some clues for you. If you have serious questions, return to the top and review. Then try to do this again without looking.
12. Make a new pattern on a new layer as you did above. (Make, select, then define.)
13. Delete that layer after you have defined your pattern, and make a new layer. Or you can erase the pattern sample that you just made and reuse the layer, if you don't want to be wasteful. ;)
|
 |
| 14. Use your Type Mask tool (the dotted line one
under your Type tool) to place a selection of a large block (shows up
better) letter on your new layer.
15. Fill this selection with your pattern just as you did in step 10.
16. If the letter seems to "go away" against the busy patterned background, you can combat this in a couple of ways. First, you can go back and make your new pattern a little more contrasted with the old one, or secondly, you can make use of layer effects on your letter layer to define it better. Find these under Layer -> layer effects. In the example above, I used Emboss and drop shadow. Here I've just used drop shadow.
|
|
|
|
|
I hope you have enjoyed this pattern play! Want more pattern tutorials?

|
 TV Lines TV Lines
 Beehive Tilings Beehive Tilings
 Seamless Tilings Seamless Tilings
 Seamless Tilings 2 Seamless Tilings 2
|