Over
the Rainbow Over
the Rainbow
In this fun tutorial you will learn to make a rainbow. Along the way, you will learn some very useful techniques:
- Make your own custom gradient using varying colors and opacities.
- Use layer opacity.
- Use a Radial Gradient.
This tutorial was originally made with Photoshop 5.5. There have been some changes in some relevant parts of this tutorial for users of 6.0 and i will include those differences in red.
Directions and screenshots for 6.0 were supplied to me by wes and are used here with his permission.
|

|
| 1. File
-> New .. and make your canvas big. I will use 700px square.
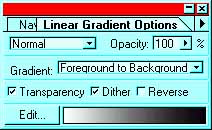
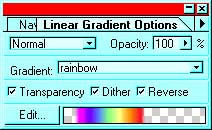
2. Choose the Gradient tool from your toolbox. Now have a look at the Gradient Options.
|
 |
|
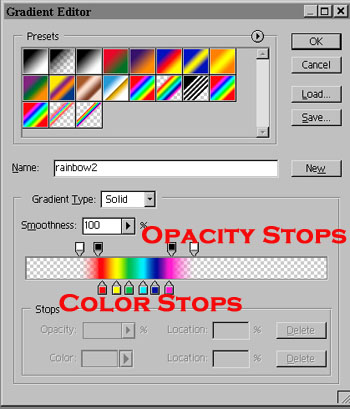
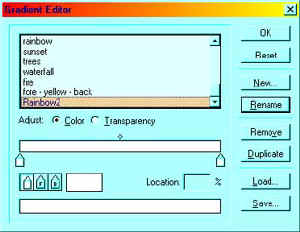
3. Click the Edit button in the options palette. Your Gradient Editor will look like mine to the right.
(Version 6: Click the gradient box at the top left corner. This will bring up the gradient editor.)
At this point you can either edit an existing gradient, duplicate an existing gradient to make a new one using it as a starting point, or you can make a new one. Let's make a new one.
4. Click the "New" button and name your new gradient "Rainbow". Be sure that the color spot is chosen because we are going to edit the colors first.
(Version 6, type in the name under name. Your color and transparency stops will be on the same picture so it is easier to tell what you are doing.)
|
 |
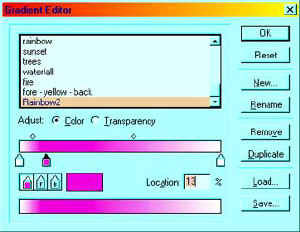
| 5.
Now you are going to add your colors. Click the area below the gradient
bar where the little color stops are, right where i have my magenta one.
This creates a new color stop. Then click the color swatch and make that
little color stop magenta.
(The little stops in the box next to your color swatch enable you to use whatever color is in your foreground (F) or in your background (B) in your gradient. Try this out by first clicking one of your color stops, then the (F)foreground color stop and see what it does. Click the colored one in the box to return to the way it was.)
(Version 6: The color stops are found on the bottom of the bar. Clicking on them will bring up a color box at the bottom of the window. Clicking on that color allows you to change it. New stops are added just by clicking below the bar where the color stops are located.)
|
 |
| 6.
Keep adding color stops in this way till you have your rainbow. You can
move the color stops till you like the appearance of your rainbow. Scoot
it over to the left as i have done here. |
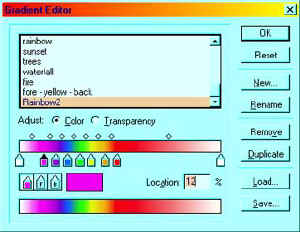 |
| If
you were to hit OK now, and made your gradient on your canvas, you would
have white above the magenta and below the red. Not good. Let's fix that
by making the ends of the gradient transparent.
7. Tick off the spot next to "Transparency" in the Gradient Editor so that you can adjust that.
This is now the "Gradient Transparency Mask" that you are going to edit. The black places are masked, that is, they are protected. In other words, they are where your rainbow gradient will show through. The white places are where the gradient is not masked, or where it won't show. This shows up in your preview bar (at the bottom, left) as transparency.
(Version 6: The transparency stops are placed along the top of the bar instead of in a separate bar. The opacity settings are similar. By clicking on the transparency stops you can change their opacity settings.)
|
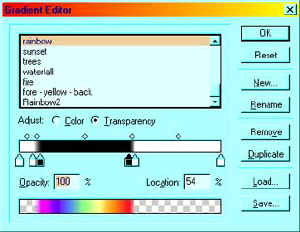 |
| 8. If
you want the rainbow to fade out and be more transparent on either end
than in the middle, you will want to put one transparency stop in the
middle of your rainbow, setting its opacity to 100%. I want my rainbow
to be opaque in its entirety, feathering into transparency at either
side. The white transparecy stops above are for 0% opacity (transparent
areas) while the black ones are for 100% opacity.
The Location % enables you to be very precise in evening up your gradient if you need to.
9. Go back to color adjusting if you need to, to make your rainbow gradient look like you want it. After you click OK, your Gradient Options box will look like mine to the right. Be sure that Transparency is checked so that the transparent parts of your gradient will, indeed, be transparent.
|
 |
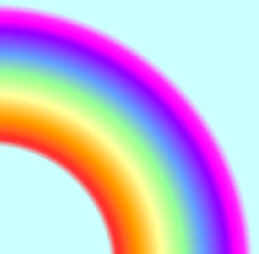
| 10.
Time to test it out! Make a new layer by clicking the new layer icon at
the bottom of the layers palette next to the trashcan. Choose the Radial
Gradient tool from underneath the Linear Gradient tool in your
toolbox.
11. Starting at a lower corner or the bottom edge of your canvas, drag your gradient. Red on the top? Click "Reverse" in your Gradient Options box! :)
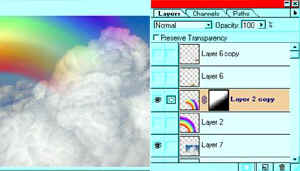
12. Adjust the opacity of your rainbow if you like, by changing the opacity of that layer in your layers palette.
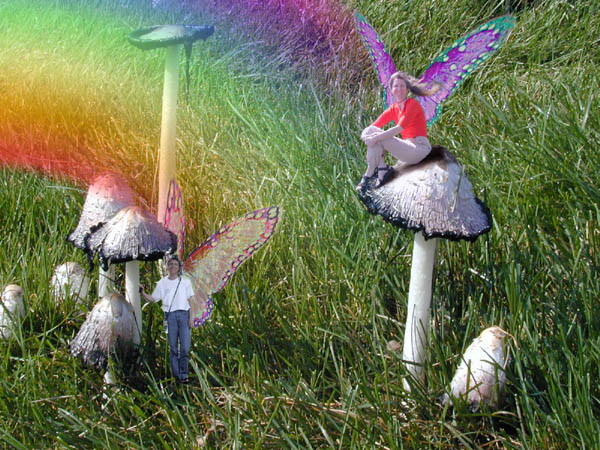
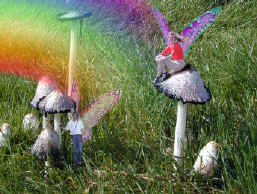
See what fun you can have with this!
|
|
|
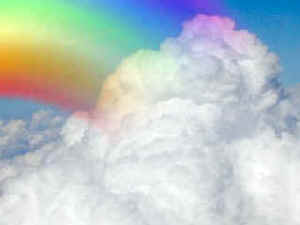
For this example on the right, I used a layer mask over the rainbow layer to make the rainbow seem to fade into the clouds.
For Adam's Camaro below, I used Filter -> Distort on the rainbow layer.
|
 |
 |
 |
|
|
|
|
RETURN to Janee's Tutorial Index
Ask tutorial questions in the Message Board or email me!

|
|
|
| All material in this site is ©2001-2003 by myJanee.com Graphic Creations. No part of it may be used without my written permission. If you have questions or comments about this site or its construction, contact Janee at myJanee.com Graphic Creations, 7193 W Gifford Rd, Bloomington, Indiana, USA 47403 or by email. |
|
|
|