Basic Photo Retouching
 |
 |
| In this tutorial, you will practice use of the Clone Stamp tool, the Smudge tool, Crop tool, a bit of Levels Adjustment, and Color Balance Adjusmtent.
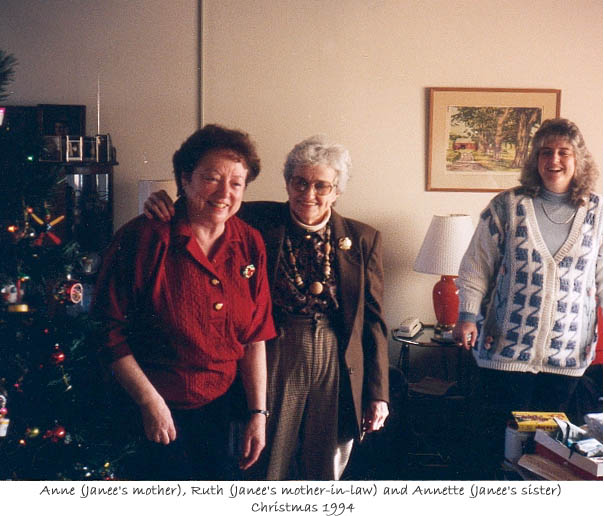
If you want to work along with me on the photo on which I'm working, feel free to copy it. Just click the small version to the right, right click on the big photo that comes up, and choose Save As.
|

You cannot fix a photo that is TOO light, that is, the whites have no detail, or TOO dark, that is, the darks have no detail. If it were possible, I'd retake this photo because it really is too dark.
|
| 1. Brightness /
contrast
To start off, I adjusted the brightness using Image -> Adjust ->
Levels. Drag the highlights slider (the one on the right) over till the
lightest parts of the picture are as light as you want them but yet
still show as much detail as possible. Then drag the shadows slider
(Left) over toward the right till the darkest areas are as dark as
possible, while still showing as much detail as possible. Then move the
midtone slider around till your picture is not washed out, yet not too
dark. Don't use the "brightness/contrast" adjustment under
Image. It does not allow you enough control. It is a shortcut that is
best left for the rookies. :) |
|
| 2. Removing ugly
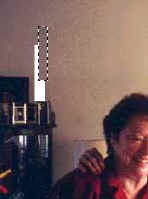
background stuff. Next I decided to get rid of that pipe thing on the wall which i find distracting. To do this, i used the rubber stamp tool, choosing an area very close to the pipe, alt-clicking there, then moving to the pipe and painting over it with the rubber stamp. Since the wall appears gradiated, the color will not match exactly but we will fix that. |
  |
|
Next, I thought that silver shiny antenna looked goofy there and so i cut a piece out of the wall above it and grafted it over where the antenna was. To do that, highlight the defect that you want to take out, and hit delete. Then, with your selection tool still chosen, drag the selection to the source of your graft. Choose the move tool and then hold alt as you drag a copy of this cloned graft down onto the defect. This is a bit like using the rubber stamp tool, just another method i thought i'd show you. :P
|
 |
3. Smoothing up. Using the smudge tool, clean up the smudgy areas of the wall, including the mess you just made with the rubber stamp. Zoom in and smudge around anywhere that looks "rough".
The smudge tool is the fingertip. Click on the blur tool (the water drop) to find smudge.
|

|
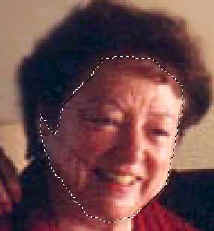
| 4. Selected
correction. I know that my mother would not want this red blotchy appearance to her face, (Vanity runs in my family) so i decided to fix it for her. I started out by selecting her face with the polygonal lasso tool, clicking around till I got it all.
Then I did Image -> Adjust -> Hue/Saturation, chose Red at the top, and moved the Lightness slider just to take a bit of that redness out.
While I had her under the anesthesia, I did a little smudge-tool work on her face too, and cloned that funny wispy hair back off her forehead with the rubber stamp tool, taking care to use skin grafts that came from close to their destination so that they would match.
|
 |
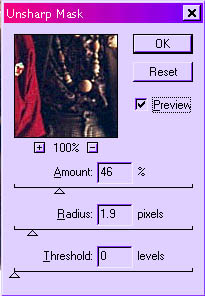
| 5.
Final Sharpening / touchup. A bit of sharpening and I declared this photo finished. When sharpening, always use Filter -> Sharpen -> Unsharp Mask. This gives you a lot more control than the generic "Sharpen" filter. |
|
|
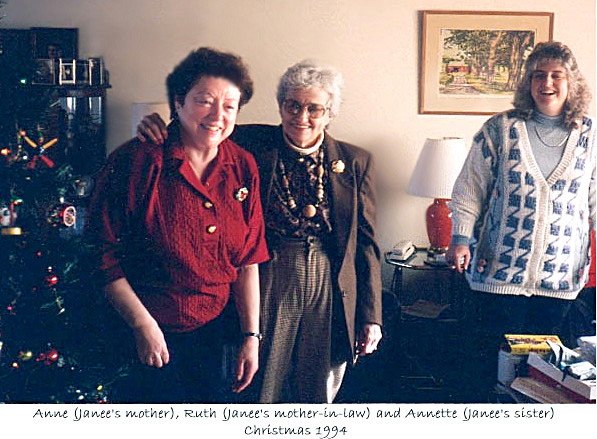
Happier even than before!
(Click to see full-sized)
|
More tutorials on photo retouching, restoring, and fixing:
 Changing a head Changing a head
 Basic Photo Restoration Basic Photo Restoration
 Fixing Demonic Pet Eyes Fixing Demonic Pet Eyes
|
|
|
RETURN to Janee's Archive Tutorial Index
email me!

|
|
|
| All material in this site is ©2001-2009 by myJanee.com Graphic Creations. No part of it may be used without my written permission. If you have questions or comments about this site or its construction, contact Janee at myJanee.com Graphic Creations by email. |
|
|
|
|