Make your own
wood!
Make your own
wood!
In this 3-part tutorial, I will give you directions for making three different types of wood. These represent three different colors and grain-types of wood and so you will use slightly different methods for each. This tutorial was written with version 5.5 of Photoshop, but you can do it with newer versions, or with Photoshop Elements.
Although your result is going to look quite "advanced," this tutorial is quite do-able for even a beginner. Through your work in this tutorial, you will learn how to do the following:
- Make a custom brush.
- Use the noise filter.
- Change the size of an image using transform.
- Use blurring.
- Use the shear filter.
|

|
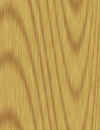
| For Oak and
Pine,
you will need the brush that you will make in the next step.
Making the brush: When I'm doing woods with these distinct grains, I like to use what I call a "hair" brush. (It is great for doing hair too.) You might be able to find one somewhere but I made mine. Here's how:
- File > New and make it 64 x 64. Using your zoom tool, enlarge this canvas to 800%. Make the background white and the foreground color black.
- Choose your airbrush tool and your soft brush at size 65 pixels. Set options for your airbrush to Dissolve.
- Click once on your canvas to create a random smattering of dots.
- Erase any dots that are touching other dots. Your goal here is randomness so don't try to get it too even.
- Filter > blur to give your little dots some softness.
- Select -> all and then click on the brush option arrow in the brushes palette and then click Define Brush. (Edit > Define Brush in later versions.) You should see your new "hair" brush at the bottom of your brushes.
|
 |
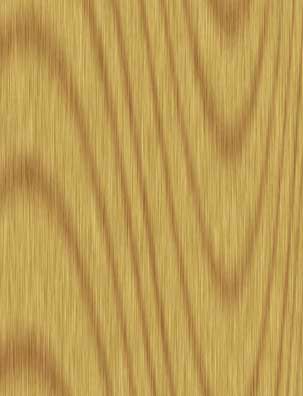
PINE
1. Starting out.
- File > New and make it big. I like 600x600. You can always make it smaller later if you need to.
- Fill with C8AC5F, a yellowish color.
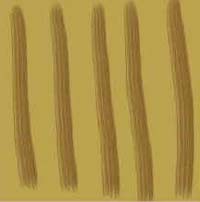
- Click the New Layer icon in the layers palette next to the trash can. You will do the lines on this layer. Choose a darkish brown color for your lines. I used 9C7236.
- Select your new "hair" brush, which you made above, and draw some vertical lines down your canvas as I have here:
|
 |
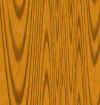
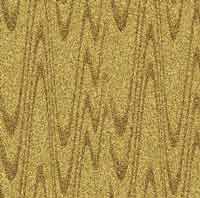
2. Shaping the grain.
- Filter > Distort > Shear. In the box that appears, check "wrap around" and drag points around on that line till you get some nice waves on the order of mine to the left.
- Edit > Transform > rotate 90 degrees.
- Double-click this layer in the layers palette so that it changes from a "background" layer to just a normal layer so that you can do the next step.
|
 |
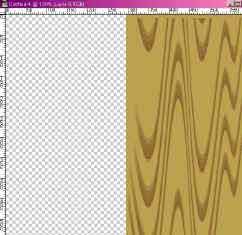
3. Refining the grain.
- Edit > free transform and drag it so that it is about half its width.
- Choose the move tool and hold Alt and Ctrl to drag a copy of that layer over to the empty half.
|
 |
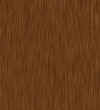
- Filter > noise > add noise .. monochromatic, about 50.
- Filter > blur > motion blur 90 degrees, about 35 pixels.
- Crop it as appropriate. Keep in mind with these woods that irregularity will actually improve the look of it. Too much perfection makes natural things... unnatural!
- James E. writes that this tutorial helped him to make "the best wood I've ever made." He adds that he tweaked it by using Liquify (Filter > Liquify). This can be quite a cool way to make knotholes, etc, but be careful not to overdo it.
|
 |
|
|
|
I hope you enjoyed this tutorial!

|
Student Work:

|