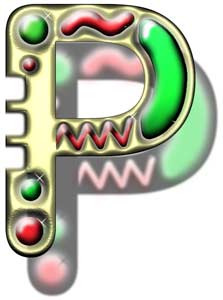
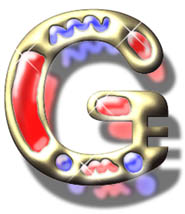
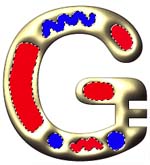
Jeweled Gold Text Jeweled Gold Text
This effect looks like inlaid glass or cabochon jewels set in cast gold. It would also pass nicely for hard candy. :)
As you create this jeweled gold text, you will be learning or practicing the following techniques:
- Using channels along with lighting effects to give a 3D look.
- Using channels to hold a selection.
- Make custom drop-shadows
- Make layers from layer effects and then manipulate these.
This tutorial is a bit long, and somewhat involved, but here's my advice for you. Read the main headers before you start. This will give you an idea of where you are going. If you see the big picture, here, you will be better able to make sense of the tutorial.
|

While a beginner will be able to make jewels, it will require patience, persistence, and perhaps a look or two at the manual along the way. And when you are done with this, you will not feel like a beginner anymore!
This tutorial was written with screenshots from version 5.5. However, directions and screenshots for versions 6 and 7 are nearly the same. This tutorial cannot be done, as it is written, with Elements, though, with layer styles, you can do the project!
|
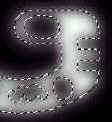
1. First make the letter in the Alpha Channel:
- File -> New... Make the file larger than you think you need. I like 1000 x 1000 pixels. You'll need RGB mode.
- Click on your Channels palette and open a new channel by clicking the Create a New Channel icon next to the trashcan. Double-click its name and call it "Original."
- Hit D on the keyboard to bring up Default colors, black for the background color and white for the foreground.
- Then type or draw your text. I drew mine.
- If you have typed your text, and you're using version 6+, you need to click on the Channel in the Channels palette to turn it back to normal black/white. If you now have a selection going, use Ctrl-D to deselect.
- File -> Save As ... and think of a clever name. (Leave it in .PSD format so that your layers and channels will be preserved. See more on this in my "Basic Shapes" tutorial.)
|
 |
| 2. Make some holes in your letter where you want your "jewels". Paint them with black or erase them. Use a hard-edged brush.
3. Next we will texturize the letter:
- Copy this channel by dragging it to the Create a New Channel icon at the bottom of the Channels palette.
- Double-click your second copy and label it "Texture."
- On the Texture channel, use Filter -> Blur -> Gaussian Blur till there is some white still visible. See below.
|
 |
4. Trim the texturized letter.
- Ctrl-click on the Original Channel to load that selection.
- Select -> Inverse -> Hit the Delete key. Your blurred letter should now have a nice crisp edge. (If your background goes to white, you don't have Default colors. Type D and then hit Delete again.)
- Ctrl-D to Deselect.
5. Enough black and white! Let's cast this in gold!
- In the Layers palette, make a new layer, by clicking the Create a New Layer icon at the bottom of the Layers palette.
- Choose a gold for your foreground color. Usually mine is #BEAD90, but for this one i used #999966 (Note: This is the hex code for R153, G153, B102. I like hex codes because they correspond to the HTML codes you use, but also, because they are easier for me to remember. Type the number into the # box at the bottom of the Foreground Color Picker box.)
- Fill your layer with the gold color, by using Alt-Backspace or the paintbucket.
- Ctrl-S to Save.
|
|
- Filter -> Render -> Lighting Effects. Choose your Texture Alpha Channel down at the bottom where it says Texture Channel and then drag the light orb around in the preview window till you like the effect.
- You may have to adjust some of the other settings too. Make it look metallic, for example, using that setting, and choose mountainous, for a more pronounced raised look. Click OK.
6. Trim the gold:
- Load the selection from Alpha 1 as you did before, by Ctrl-clicking on it in the Channels palette.
- Return to Layers, and ascertain that the gold letter layer is still active.
- Select -> Inverse -> Delete.
- Ctrl-D to deselect.
- Ctrl-S to Save.
|
 |
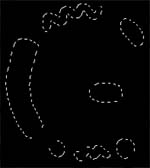
| 7. Next to make the jewels. To do this, we are going to start by making a selection of the places where the jewels are to be, that is, the holes we made: |
 |
- Select the holes where you are going to have your jewels. I like to use the magic wand for this.
- In the Magic Wand options, choose a low tolerance setting, because you don't want any white from the letter's shine to be chosen.
- Turn Contiguous OFF. (What does contiguous do? If you don't know, try this with contiguous on .. then off.)
- Hold Shift as you select to add to your selection.
- Ctrl-S to Save.
|
 |
|
Optional: Save the Jewel selections in a channel.
This is just in case you want this selection again. (Actually.. this will also show you how to make a channel from a selection you have made in your Layers palette.)
- Go to your channels palette open a new channel.
- Type D to get foreground color white, background black, and then Alt-backspace to fill the selected areas with white.
- Don't deselect. Then return to the Layers palette.
- NOTE: Starting with PS version (I think) CS, you can make a new channel from a selection by pressing the mask button at the bottom of the Channels palette! Quite slick!
|
|
 |
|
9. Fingerpainting time!
- In the layers palette, make a new layer above the one where you have your gold letter. The holes for your jewels are still selected from after the last step.
- Choose a color and then, using a paintbrush, color your jewels. Be sure to get the entire area where the cutout is covered for each jewel. (You don't have to worry about being neat though. This is fingerpainting and besides, your selections will keep the paint from getting outside the lines!)
|
| TIP: Don't pick your nose while doing actual fingerpainting! |
|
|
10. Duplicate the jewel layer. We will use this duplicate layer later for the shadows of the jewels. Drag this layer down below the other layers in the layers palette. (not below the background, though <g>)
Optional: At this point you can add glitter (noise) to the jewels if you want. (I did not use glitter in my final result, though it does look pretty cool.)
Ctrl-D to Deselect.
Ctrl-S to Save.
|
 |
|
11. Add pillow emboss to the jewels layer to add depth. (Layer -> Layer Effects or use the little f icon in the layers palette if you have version 6 or later.)
Optional stuff: (In my example below i used pillow emboss and then did Layers -> Effects -> Create layers. Each component of the pillow emboss is then put on its own layer. I then chose to keep the highlights and turned off the visibility on the shadows for the jewels.)
Then i did some airbrush tinting by hand on a separate layer. This just brough out the highlighting even more. You can also increase the effect of the highlighting in the Layer Styles palette. (Double-click the little f in the Layers Palette.) Reducing the opacity for the jewels to 75% made them look good to me.
Ctrl-S to Save.
|
 |
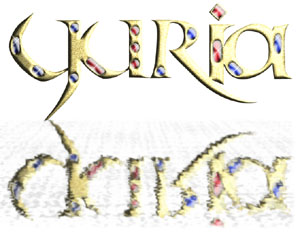
| 12. For the layer with the main letter, add a drop shadow with a distance farther away than you might normally use, so you can see the holes in your shadow.
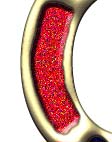
13. Now make the jewel shadow/glow.
- Remember the duplicate layer you made of the jewels before you put the shine to them? Select it in the layers palette.
- Choose the Move tool. Move the jewels down to where they fit into the letter's shadow's holes.
- Apply a good Gaussian blur to them.
- Reduce the layer's opacity.
16. Add some sparkles with your airbrush on white. (You should have a brush for this that looks like an X.)
Ctrl-S to Save.
Then, if you want to save it as a jpg for web use, use File -> Save for Web.. or if to print, File -> Save as.. and choose jpg or tiff or whatever you choose.
|
|
|
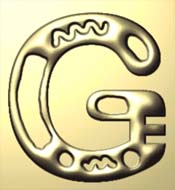
I hope you enjoyed this tutorial!
|
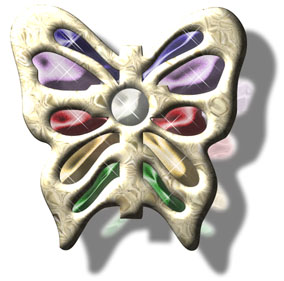
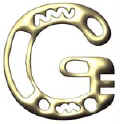
| Student work:
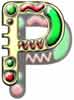  
|