Basic Shapes in Photoshop 1
Although the screenshots for this beginners' tutorial were done with Photoshop v.7, there are not many differences for users of PS 8 or earlier versions.
See my all NEW Basic Shapes in Photoshop Tutorial!
My keyboard shortcuts are for PC. If you are using a Mac, you need to convert these. Essentially, Alt = Option and Ctrl = Command.
I know that there are other ways to make shapes, including the Shape tool. I cover that tool in some depth in my Shape tutorial, "Get into Shape." This tutorial will teach you many valuable Photoshop skills involving selections.
|

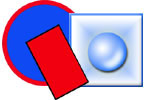
In this tutorial, you will make the rectangle and the circle.
In Basic Shapes 2, you will make the Pearly Button.
|
Beginners' TIPS:
You may find helpful clues if you hover over the pictures. Also, if there is an item in purple that you want to read more about, click it.
You will find that the last two projects depend upon knowledge you will have gained from working through the first one, so if you do start anywhere but the beginning, and run into difficulty, you will do well to start over at the beginning. :)
|
Here are some things you will learn as you work though this tutorial:
- How to make a new layer and name it.
- How to make rectangles and ellipses.
- How to make squares and circles.
- Choosing foreground and background colors.
- Two ways to fill a selection with a color.
- How to fill a selection with two different kinds of gradients.
- What it means to stroke a selection and how to do it.
|
- How to use multiple layers to create an effect.
- Using Layer Styles to create a bevel and a Drop Shadow.
- Using Brush Options to make an Airbrush.
- How to use the Dodge tool.
- How to save a file in PSD format.
- How to save a file in JPG format.
- About quality levels in JPG's.
- Keyboard shortcuts:
|
| A.
Rectangle
1. File -> New. Make your canvas 300x300. 72 dpi is fine, and you should be in RGB mode.
2. Find your Layers palette and click the New Layer icon at the bottom right next to the trash can. Double-click the name of the layer in the layers palette and type in a new name. I gave mine the clever moniker, "Rectangle."
|
 |
| 3. With the Rectangle layer selected in the layers palette, choose the Rectangular Marquee tool in the toolbar. Check the Options bar and be sure that you have Feather of 0 and Style is Normal.
Then drag a rectangle across your canvas as I have done here. This is actually a "Rectangular Selection." 
4. Click the foreground color square, (here mine is red) and then choose a color for your rectangle. Click OK.
Now I said that this is a "rectangular selection," and not a "rectangle." Why? Well, a selection on an empty layer is empty, because there are no pixels within it. Let's fill the selection with pixels and make a real rectangle.
5. As with most operations in Photoshop, there are several ways to fill a selection. Here is my favorite way: hold the Alt key and click the backspace key. This fills any selection with your foreground color.
|
|
|
Digression: If Alt-Backspace fills the selection with the foreground color, guess what Ctrl-Backspace does?
(Hint: Be sure that your background color in your toolbox is something other than white when you test this, or you won't see what it does.)
|
6. Next let's make a border on the rectangle, an operation known as stroking the selection. Click your foreground color square and choose a different color. I chose black. Click OK.
|
|
|
 |
|
7. In the menu, click Edit -> Stroke. (Notice "Fill" there. That is the other way to fill a selection.) In the dialog box that appears, type in a number of pixels for the width of your border. I used 4. Decide whether you want the stroke to go inside, outside or centered on the selection. Click OK.
Ctrl-D to deselect. Done!
|
|
| B.
Circle
Next you are going to make a circular selection, then fill it and stroke it.
1. File > New and make your canvas 300x300. 72 dpi is fine, and you should be in RGB mode. Start on a new layer as you did for the rectangle. (Think about how to do it before you look back.)
2. Click and hold the rectangular marquee tool till the other tools under it fly out. (Each of the tools with the tiny arrow in the lower right corner has other choices underneath!) Choose the Elliptical Marquee tool as i have done to the right.
3. Now if you just drag this out, you will get an ellipse. Try it. It is difficult if not impossible to get one that is a PERFECT circle though without a trick and here it is: Hold the SHIFT key as you drag the ellipse out. Perfect circle! (What will happen if you hold Alt and shift as you drag the ellipse out?)
|
 |
| 4. Now fill and stroke your circle as I have on the circle to the to the right.
Try to remember how you did it with the rectangle before you look above, but then do look above if you need to. (Don't worry if you mess something up because you can always start over at this point or you can click back in the history to undo your mistakes.) Ctrl-D to deselect.
|
 |
|
Congratulations on completing the first part of the Basic Shapes Tutorial! I hope you enjoyed it and learned a thing or two too!
Now you are ready to make this Pearly Button!

|
 |