 Correcting Uneven Lighting Correcting Uneven Lighting
My goal is ultimately to make this into a piece of illustrative artwork. I'll cover that part in another tutorial. But for this lighting part, i want to make the photo maybe a bit lighter than I otherwise would. I'm also going to enhance the saturation of those beautiful Chicago autumn colors!
Though this tutorial was written with beginners in mind, and I emphasize concepts that are important for beginners to get, more advanced users may well learn a trick or two, as well! Here are some of the concepts we use:
- Working with a photo that has both areas that are too light and too dark
- Creating a Levels Adjustment Layer
- Creating a Hue/Saturation Adjustment Layer
- Using a mask on an Adjustment layer
- Saving your work in PSD format
This tutorial, written with Photoshop 7, looks at one way to enhance the lighting and color in a photo. These methods will work equally well with Photoshop versions 5.5+ and Elements 2.
|

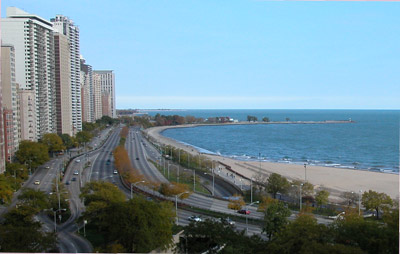
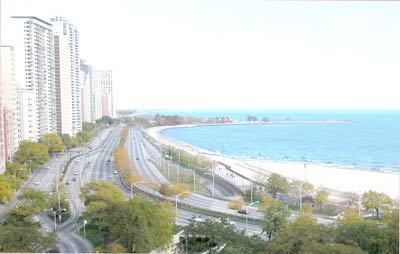
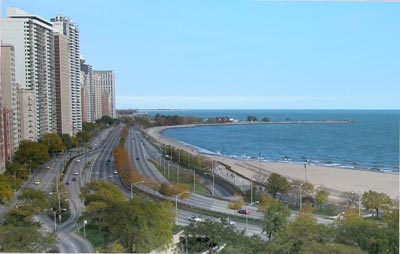
Before
To use the uncompressed TIF version of this photo, right-click on this smaller version. Then click on Save Target...
This photo is ©2002 by me, Janee. You have my permission to use this photo only for purposes of this tutorial. Neither this photo, nor your work on it, may be published in any form, without my permission.
I shot this photo from our hotel window in late October, 2002, at Chicago's Drake Hotel.
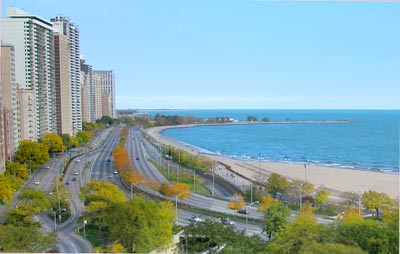
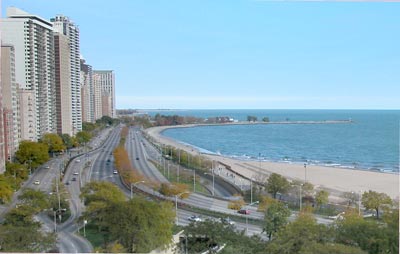
After
|
| I like to start out fixing the worst of the mess first. Though this photo is a neat composition, the foreground is way too dark, whilst the upper part of the photo is really just right as it is. Let's fix this.
Get into the habit of using Adjustment Layers. These are like special overlays which make the photo look different, whilst the pixels of the picture underneath remain unchanged. This is a form of "non-destructive editing."
1. Lighten the foreground.
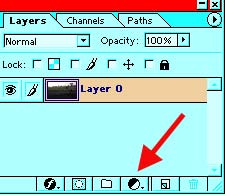
To lighten this foreground, make a Levels Adjustment layer:
- Click the Create a New Adjustment Layer icon at the bottom of the Layers palette.
|
 |
- This brings up a dialog box in which you can adjust these sliders. At this point, we are JUST lightening the foreground, so don't pay attention to the rest of the picture. We'll fix it in a minute. ;)
- Click OK.
|
 |
|
Tip: Here is a good rule of thumb for Levels adjustments. Move the light and dark (left and right) sliders each toward the center, so that they are just touching where the points of the histogram begin. Then fiddle with the midtones slider till you like the way the picture looks.
|
 |
| Now you have this situation: The foreground is great! But the top of the photo is washed out and horrible. How to fix it?
2. Masking part of the Adjustment.
Notice in the Layers palette, the adjustment layer has two parts. There is the histogram symbol, showing us that it is a Levels adjustment layer. Then there is the white square. That white square is the mask for that Adjustment layer.
|
 |
|
You can use this mask to block this adjustment from parts of the picture, in this case, the top part.
|
- Painting black on the mask HIDES that part of the active layer.
- Painting white on the mask SHOWS that part of the active layer.
- What does painting GRAY on the mask do? Try it!
|
| So we want to paint black on the top part of this mask, in order to block out this icky lightness. But at the same time, we want to keep the mask white for the foreground. And we want a GRADUAL transition between the foreground and background. |
Gradual? Think GRADIENT!
|
- Click the mask for the Levels Adjustment layer.
- Type G for the Gradient tool.
- Type D for Default colors, white on black, for masks.
- Be sure that you have Foreground to Background and also Linear Gradient chosen in the Options bar.
- Drag the gradient from bottom to top on your canvas.
|
|
| This will paint on the mask, so you won't see the black and white on the canvas. You will see it on the little mask in the Layers palette though. |
 |
| This makes the picture much better! The foreground is suitably light, the top of the photo is not too light.
3. Making another Levels Adjustment.
The center of the photo, though... to me it is too dark. Let's fix that with another Levels Adjustment layer and then mask it appropriately.
|
 |
| What I did here was to adjust the midtones a bit lighter, to the left. |
 |
4. Adjusting the Adjustment.
Painting a reflected white -> black gradient on the mask for the second Levels Adjustment layer evens things out. |
 |
| And here is the result at this point. |
 |
5. Enhancing the colors.
I also want to enhance, and almost exaggerate the colors. This is really for the purpose of the next thing that i'm going to do in the 2nd part of this tutorial, though i kinda like the look of it with the colors brighter.
I'll do this enhancement with another Adjustment Layer. This time, I choose Hue/Saturation.
|
You can alter Hue/Saturation on the color channels individually, if you choose.
|
|
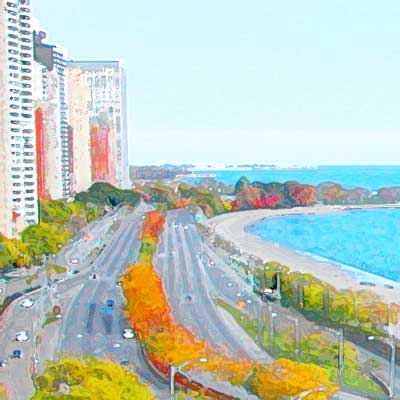
For my purposes, i wanted to kick up the volume on the reds, yellows, and cyan. This brought out the hues in the trees and the water. I made the change dramatic, because of what i'm going to do next. My goal isn't exactly realism, when i increase the saturation to this degree.
|
|
| As we continue this tutorial, we will make this photo into a digital painting like at the right! |
 |
|
I hope you enjoyed this tutorial!

|
|
