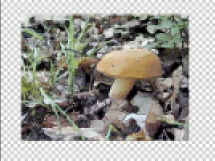
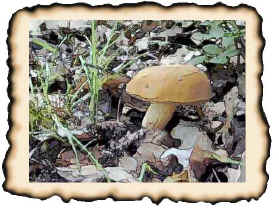
In this tutorial, written with beginners in mind, we will be burning the edges of of a picture. First we will do a photo with a crisp edge where it is matted, I give you the directions for that here. At the bottom of this page, I have links to parts 2 and 3, where you use two other edge options. 1. File -> open and choose the file with your picture. In the layers palette, double-click the picture layer in the Layers palette, so that it changes from "background" to a regular layer. Label it "Picture". File -> Save as.. Leave it in psd format and choose a name and location for it. |
You will get some good practice here working with layer masks. You will also practice selecting with the lasso tool and the rectangular marquee, and doing some freehand painting. |
| 2. If you want your border to extend outside your picture rather than covering up part of it, you will need to make your picture smaller or your canvas bigger. I'll make the picture smaller.
Click on the Picture layer to select it and then Edit -> Transform -> Free Transform. Grab a corner handle of the bounding box and hold the shift key down while you drag the corner toward the center of the picture, to make it smaller. Holding "Shift" keeps the proportions the same. (To enlarge the canvas, use Image -> Canvas size) |
 |
|
3. Click the new layer icon in the layers palette to make a new layer. Right click it in the layers palette and name this "Matting," or something equally clever. With your color picker, choose a color for your matting and make that the foreground color. Alt-backspace to fill your Matting layer with this color. Ctrl-s to save. |
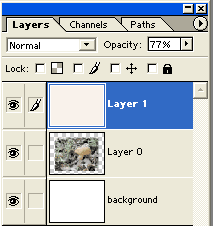 |
| 4. In your layers palette, reduce the opacity of this Matting layer so that you can see your picture underneath. Now we are going to make a layer mask for this matting layer. This will give us the freedom to do more with this layer later.
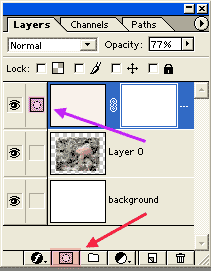
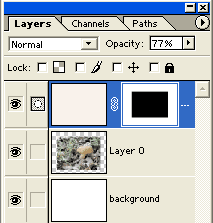
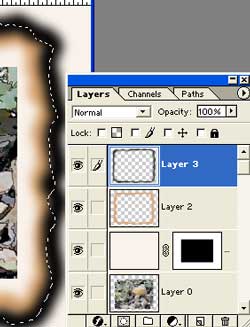
5. Click the Add Layer Mask button. This is shown in the pink layers palette below for version 5.5 and in the gray one for version 6. |
Once you push the button, you will see the white layer mask appear on the border layer. You will also notice that the little paintbrush next to the eye has turned into a layer mask icon. this tells you that you are working with the layer MASK and not the layer itself. Ctrl-s to save. |
  |
|
|
6. Now we are going to cut the mat so that our picture shows through. Using your rectangular marquee, mark where you are going to cut your matting for your picture. (Decide upon a shape for your picture. If you want a circle or ellipse here, you can do that in place of my rectangle.) |
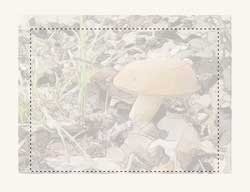 |
| 7. With black as your foreground color, and being sure that you are working on the mask for the matting layer, alt-backspace to fill this selection with black.
Ctrl-d to deselect. Tada! Now your picture shows. Click your matting layer and return its opacity to 100%. Ctrl-s to save. |
 |
|
What do you think will happen if you paint in white on the black part of the mask? Choose white for your foreground color and a paintbrush. Paint around on this to see. Was it what you expected would happen? Now try these:
Now that you are finished playing, choose white as your foreground color and alt-backspace to fill your mask with white again. Make your rectangular cutout that you had above and let's get back to this burned edge. |
|
|
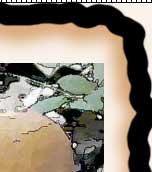
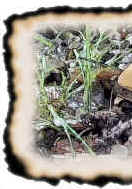
8. Click the New Layer icon at the bottom of the layers palette for the orange part of your burned edge. Choose a paintbrush and a brownish orange color and, with a very shaky hand, draw an edge around the picture as i have done to the right. |
 |
| Filter -> Blur -> Gaussian blur.
Ctrl-s to save.
|
jj
 |
|
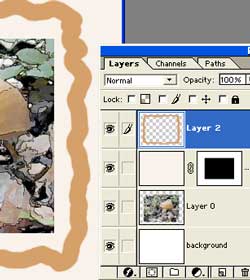
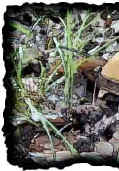
9. Make a new layer and then do the same with black. Blur it, too, as you did with the orange. Your layers palette should look like mine to the right. Ctrl-s to save. |
 |
|
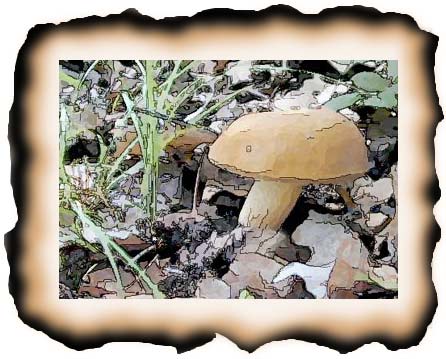
10. Time to trim! With that same shaky hand and your lasso tool, trace a selection through the black. You do not want this to be even or neat. If you "can't draw," you CAN draw this! Select -> Inverse -> and click the Delete key on your keyboard. This trims off the black. With this same selection, click on your orange burn layer and hit delete. Then click on your matting layer and click delete. (This is the matting layer and not the mask.) If you still have picture showing outside this border.. guess what? Click THAT layer and then Delete. Ctrl-d to deselect. Ctrl-s to save. If you want to save this picture as a jpeg, File -> Save as... and rename it. OR, if you are using it for the web, File -> Save for Web. I have a tutorial for Save for Web here. |
|
|
All done! I hope you enjoyed doing this tutorial and that you learned some useful things about layer masks!
|
If you want to use this same edging as a frame for other pictures, you can do that too. You will want to merge the burned layers and the matte. First discard the layer mask on the mat layer, then merge. File -> Save for Web and put it in a folder that you label "Frames." When you want to use it, drag it onto your picture file, resize as necessary, and cut out the center. |
 |
|


Other Edge Options:
 |
 |
| B. Montage Edge | C. No Edge on Pic |
|
Take the technique and run with it!
Student work -- click to see larger:
|
|
RETURN to Janee's Archive Tutorial Index
|
|


