A Watercolor from a Photo A Watercolor from a Photo
In this tutorial we will go through the steps to make a photo into a watercolor. The emphasis here is on the ethereal watery nature of the watercolor medium. While we are working for edge definition, we are not going for that pen-ink definition that we had in the gazebo tutorial. As you work through this tutorial, you will pick up some useful Photoshop skills.
- Adjusting levels to brighten your picture.
- Cloning out unwanted parts of your photo with the rubber stamp tool.
- Using filters.
- Using layers and layer blending modes.
- Using the paintbrush tool.
|


|
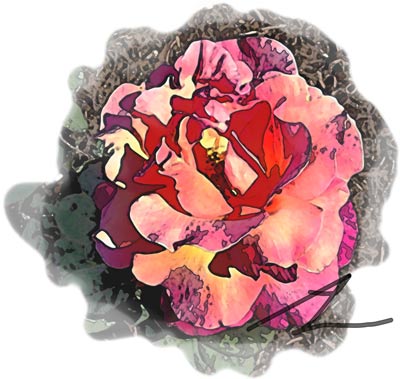
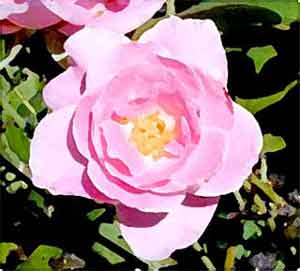
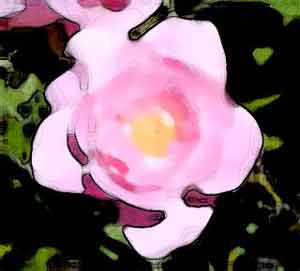
| 1. File -> Open and find the photo with which you want to work. I am using a photo that i took in Washington DC of a rose.
2. Click on Image -> Adjust -> Levels and move your sliders as you need to to brighten your photo. You will want to probably bring the lightness slider and the darkness slider both closer to the center. Don't overkill this, but you want to increase the contrast some.
3.. Use Filter -> Sharpen -> Unsharp Mask to bring your photo into sharpness. No need to overdo this, but you do want it sharp to start with. Adjust the sliders till you like the look.
If you oversharpen you will have kind of a halo effect around your subject. You may like this, especially if you are doing a "painting" such as this. It really depends upon your subject.
|
 |
| 4. Use the Rubber Stamp tool (not the pattern stamp; they look frightfully similar) to clone out any distractions to your image. At this point, I didn't know that i wanted to get rid of that partial rose at the top, so i didn't clone that out at this point. All i cloned here was to fix that bottom petal where it is split. Hey, if nature can't make it perfect, Photoshop can!
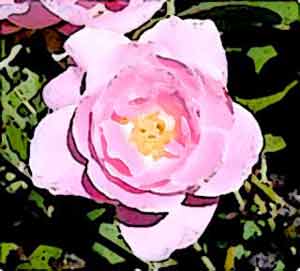
5. Filter -> Artistic -> Dry Brush... and play around with the sliders till you find a look you like. I used 2 for the brush size, 8 for the detail, and 1 for texture.
|
 |
| Now let's darken those edges a bit.
6. Filter -> Artistic -> Poster Edges. I like a setting of 2 for edge thickness, 3 for intensity, and i couldn't tell any difference with posterization for any of the settings. It might matter depending on the subject.
Duplicate this layer by dragging it to the new layer icon at the bottom of the layers palette next to the trash can. Label the top one Outlines and label the bottom one Softness. (You can name them Fred and Ethel if you want; the point is that they will have two different purposes in the end.)
|
 |
| This next step will give the Softness layer what it needs. Turn off the eye in the Outlines layer so you can see what you are doing to the Softness layer.
7. Filter -> Brushstrokes -> Accent Edges.
I used settings of 1, 3, and 14 for width, brightness, and smoothness.

|
 |
| Now the painting above looks just TOO ethereal. We need some definition. We will give this definition in the Outlines layer and then we will blend the two layers.
8. With the Outlines layer selected now in the layer palette, and its eye turned on, click on Filter -> Stylize -> Find Edges.
|
 |
| 9. Now with the Outlines layer still active in the layers palette, go to the mode chooser either by double-clicking the layer or just find it at the top of the layers palette, and choose multiply. Do experiment with all the different modes. Your results may vary. Batteries not included. |
 |
| 10. Touch up places where you need to touch up by making a separate layer and using a paintbrush set on 70% opacity and wet edges. When you paint over something a second time, it has a cumulative effect this way, rather like using a magic marker.
For my example, I lightened up the shadows around the bottom of my rose and also added some leafiness around the perimeter. I painted out the other rose too :)
11. I did the edge by painting around the edge on a new layer with a loose hand, wet edges, an unsoft brush with white.
I hope you enjoyed this tutorial and learned a few things along the way!

|
|
|
 Another tutorial which you can use to give your photo an oil- painted effect! Another tutorial which you can use to give your photo an oil- painted effect!
 And another which will give you a pen-and-ink watercolor effect! And another which will give you a pen-and-ink watercolor effect!
AND.. if you like doing this sort of artwork, you would LOVE my Photos into Artwork class! We explore many different ways (far beyond the scope of this tutorial) to create real artwork from ordinary photos.
I love to see what YOU do with the ideas that I present!
Here's a painting from a photo done by Andrew Loeber:
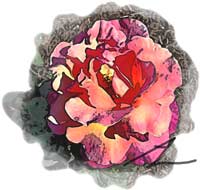
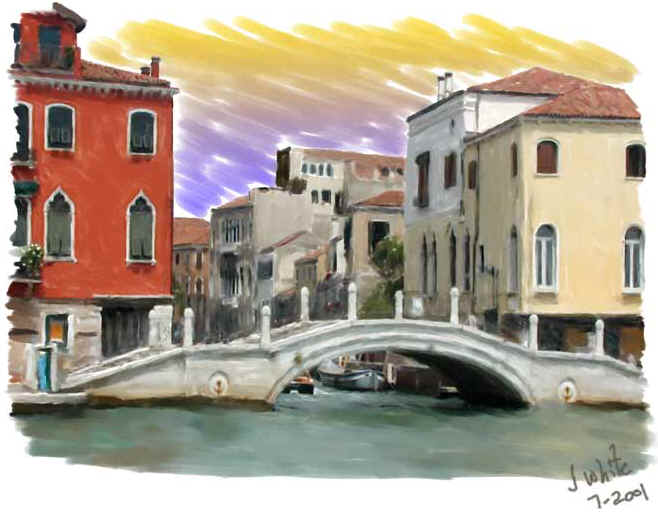
This is a water-colored photo that Jack White did from a photo that he took in Venice Italy. Click to see it bigger.

|