 |
|
 A Painting from a Photo A Painting from a Photo
As you work through this tutorial, you will make a favorite photo into a painting. In the process you will learn/practice the following techniques:
- Using the rubberstamp tool and levels to clean up your initial photo.
- Use the Unsharp Mask filter.
- Use the smartblur filter in a couple of different ways.
- Use filters to create a watercolor look.
- Use the magic wand
- Use the "soft light" layer blending mode.
|

This tutorial will work with Photoshop 5.5 - 7.0 or with PS Elements 2.0. The screenshots are done with PS 5.5, but they are not much different with other versions.
This tutorial is written for YOU! If you are a beginner, don't become discouraged by the seemingly many steps and parameters. Just be patient and play around with the effect till you are more comfortable with it.
|
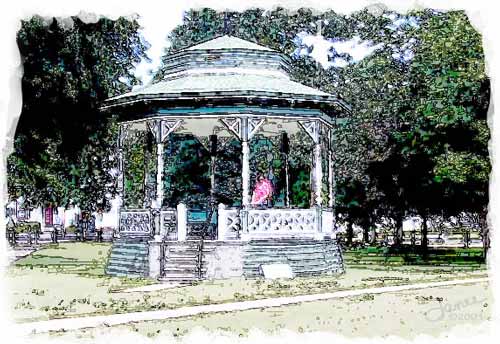
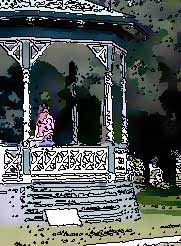
| Choose a photo to make into a pen and inked watercolor. I will use this vacation 2000 photo of me, Janee, in the gazebo in Townsend Massachussets. It was built in 1895. (The gazebo, not me.)
1. Garbage in -> Garbage out. If you start out with a crappy photo, your "painting" will most likely be crappy too, so work on your photo a bit first. I will not go into depth with this part.
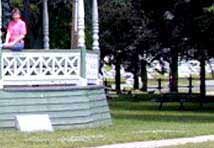
I began by cloning out the trashcan and our motorhome in the background. Use the rubberstamp tool. (Be sure to use the Rubber Stamp and not the Pattern Stamp.) Hold the Alt key as you click the part that you want to be the source of your cloning, go to your target, and then click away. It is amazing what you can get rid of using this handy tool.
File > Save As .. and think of a name for your painting. Leave the file in PSD format.
|
 |
| 2. Image > Adjust > Levels and make your image more highly contrasted. Also do any color adjusting that you want to. Exaggerating the colors by upping saturation can help here. In my photo, I adjusted the levels to brighten the whole photo a bit.
Double-click this layer in your Layers palette to make it a regular layer instead of the background and then drag it to the New Layer icon beside the trash can to duplicate it. Do this again so you have 3 copies altogether.
Double-click one of the layers' names and name it Pen & Ink. Do the same to another and name it Watercolor. Leave the third one alone. Drag the pen-ink layer up to the top of the stack in your Layers palette.
|
 |
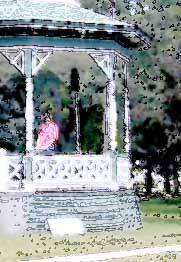
| Now we are going to do the Pen-and-Ink.
3. Filter > Sharpen > Unsharp Mask. Move your sliders till you get an exaggerated sharpness, but not so that it looks goofy. See my settings to the right. This is to increase the contrast so that your pen & ink will closely approximate your outlines.
|
 |
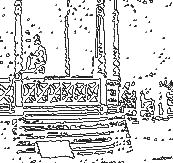
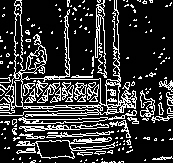
| 4. Image > Adjust > Threshold. I used 240 for my threshold. A lower threshold will give you more "ink" for a darker, more detailed look.
Ctrl-S to Save.
5. Filter -> Blur -> Smart blur. Down at the bottom, choose High quality and Edge Only. Use settings of 10 for radius and 50 for threshold.
6. Image -> Adjust -> Invert. Pen and ink! Drag this layer to the new layer icon in the layers palette to duplicate it.
Ctrl-S to Save.
|
|
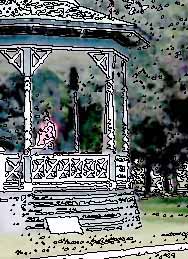
| Next we will do the watercolor.
7. Turn off these pen and ink layers in your layers palette by clicking on the visibility eyes. Choose your Watercolor layer in the layers palette. Filter > Artistic > Dry Brush. Try various settings here. I used brush size 2, detail 8, and texture 1.
(I also like Palette Knife for this step. It gives a nice soft look to the painting, which i found nice for this subject.)
8. Soften this a bit if you like, by using Filter > Blur > Smart Blur again. This time use High quality and Normal mode.
Ctrl-S to Save.
|
 |
| How you apply your pen-ink layer over your painted layer is up to you and your effect will depend upon your subject, too. Here are some options for you.
9. a. Make one of your pen-ink layers visible. With your magic wand, Contiguous option OFF, click a white space. This will select all of the white areas on the layer. Hit the delete key. This leaves only the black. The pen, and the painting shows through.
b. OR In the layers palette, change the mode of the pen-ink layer to "soft light". (Overlay or multiply may also be good, depending on your subject.)
|
 |
| c. Do both a and b using the two different pen-ink layers you have. Put the one in which you delete the white in the topmost position in the Layers palette.
10. Although I got my effect by purely automated means, excepting the initial touchups that i did, you may well want to do some touch-up painting using a paintbrush. You can add softness, light, depth, to create the look you want. You can also erase some of the "pen" on that layer if you want to, just another of the advantages of layers!
|
 |
|
11. If you want to replicate my watercolor-style border, here is how i did it. Make a new layer. Using white and a non-feathered big brush, and "wet edges" checked in the paintbrush options palette, make short jaggy strokes around the outside. Make sure that the very outside is all the way white so you don't have the abrupt photo edge showing at all. When you make multiple strokes, with the wet edge brush, it will get whiter with each stroke. Imperfection is the key to realism here.
When you are ready to save the finished result, File > Save As... and name your file, saving as a jpg. Don't flatten it, but keep the layers intact in case you want to mess with it further. If you are doing this for the web, you can use File > Save for Web, too. :)
|
 |
Student Work:
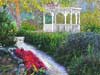 by Kent Christiansen. by Kent Christiansen.
Click to read how he did it, and to see full-sized.
|
I hope you enjoyed this tutorial!

|
|
|